
* This post is not a tutorial on how to install pine flooring. It is more of an account on how we installed vintage tongue and groove pine flooring. There was a lot of work involved to get it done and to make it work. In the end, my goal was to re-purpose and reuse the flooring that I found in my attic. I believe re-purposing and re-using is all part of the charm of an owning an old home…
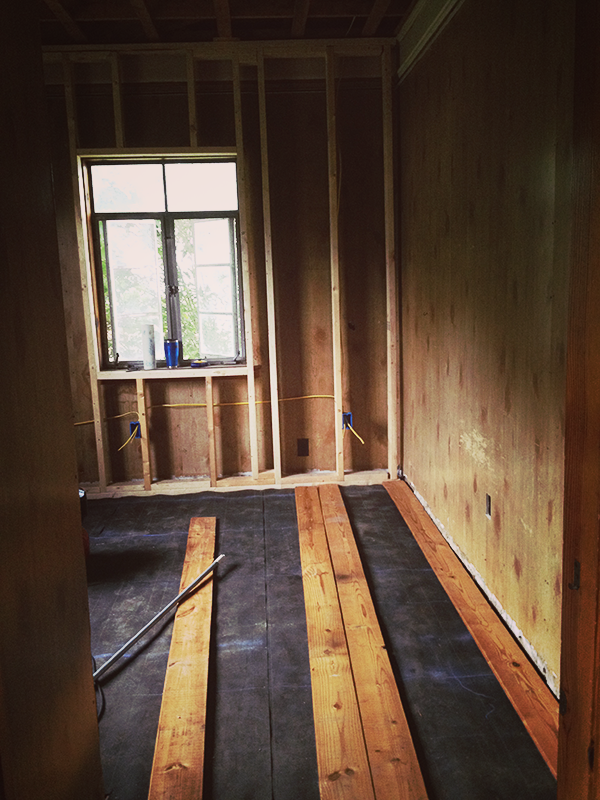
The pine flooring project was one that I had been looking forward to since the beginning. Soon after purchasing the house, we found gorgeous old tongue and groove pine flooring in the attic. It had been tossed onto the rafters to act as the attic flooring. I had no idea where I was going to use it, but knew that it would be brought down from the attic and re-purposed somewhere in the house. Fortunately for me, we had just enough to cover the floor in my office. When I say we were cutting it close, I mean, literally, we had just enough. In the end, after the job was complete, we had 2 boards left.

Lucky for me, my friend Haynes, of Life Appalachia, knows a little bit about laying hardwood floors and volunteered to lend tools and a hand. He had recently completed his own hardwood flooring project and knew exactly what to do.
We started with a plywood base and a layer of felt, nailing them to the studs. Once the room was felted we marked the location of the studs using a chalk line and began measuring, cutting and laying the first pine board. The first board was placed a 1/4″ from the wall side, to allow for expansion. It was cut snug with an 1/8″ on the end sides because the boards do not expand end to end. Once the first board was laid, we used a floor nailer to staple it into place, making sure to nail it to the studs.
 After the first board was stapled down, we placed the second. Slowly moving down the board, we tapped it into place with the tapping block and stapled it with floor nailer. I wish I could say that progress went smoothly after that, but using the “mature” hardwood proved to be quite a challenge. In the end, we pried, man-handled and wedged our way through the room. First, we had dad prying the flooring into place while Haynes and I took turns stapling, we got a little more creative as the day progressed.

In the beginning, it was fairly easy to keep the boards in line using the tapping block and pry bar. However, as the day progressed and the boards got more “character” we began using wedges to pry them into place and close the gap between the boards.

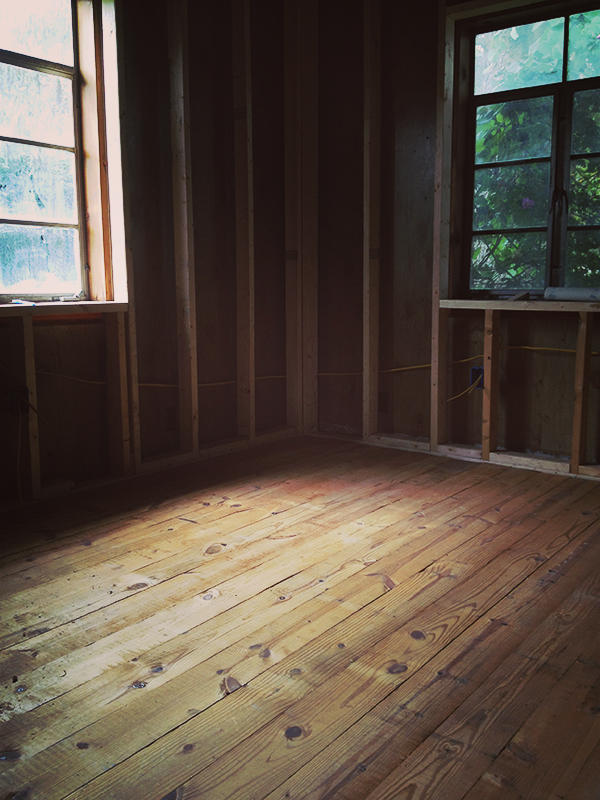
In the end, I love how they turned out! I wouldn’t replace the character and charm of the old flooring for new flooring. Now, I am in the process of trying to decide how I will treat them. I think I will keep them light, but am in the process of researching the best option for treatment. Have you worked with pine flooring? If so, do you have any recommendations on treating it to keep the character, but protect them?
The finished product…
Now, we just need to finish adding the ductwork for the HVAC, electrical, sheet rock and paint and I’ll be working out of here in no time…
If you have stumbled upon this post without seeing the final post, check it out here.