
I am so excited to share these house makeover photos with you today! We all know, renovations always take longer than anticipated and this one was no exception. The house itself took over 10.5 months of hard work to make liveable. In addition to that, it has taken over four years to get back to blogging about it! Needless to say, I am beyond eager to share is an understatement.
This isn’t my first house makeover.
When I started this project in June 2014, I was a blogger. I had a blog called The Mustard Ceiling. It was where I shared my passion for interior design and DIY projects. Between 2011 and 2014, I had spent hours making over properties that needed TLC and sharing each one with readers. All of the house makeovers were simple. Focused mainly on cosmetic changes. I used to paint, fabrics, artwork, and simple DIY projects to make each house a home. I was very excited when I purchased my third house in 2014, to tackle a full renovation. I was also eager to share the journey with my readers along the way. Then, a major shift happened in my life. During the renovation, I decided to close The Mustard Ceiling blog and TMC Designs, my web design business, to start a restaurant in Fayetteville, WV with two friends. For two and a half years, I was consumed with the restaurant. My old readers would reach out asking for updates on the renovation, but updates were at a standstill. My house was livable. But, during the restaurant years, I didn’t work on it at all.
As you may know, life has a funny way of getting you back on track. In February 2017, I shut the restaurant down after our partnership fell apart. I spent a year quietly playing on the house, finishing projects that needed completed. My little house still has many projects to work on, but now you can come along as I work on it. Today, I am happy to share a few before and afters with you (more to come later).
Are you ready for the tour? Come on in…
Entry
When I first purchased this house, the living room and entry were all one room. I wanted to separate the space by closing the entry in a bit. However, I wanted to keep the overall feeling open. The walls in the entry were sheetrock with a faux wood grain and the floor was old, crumbling linoleum. We reframed the walls, put up new sheetrock and laid hardwoods in the entry way. It is a HUGE improvement over the original space.
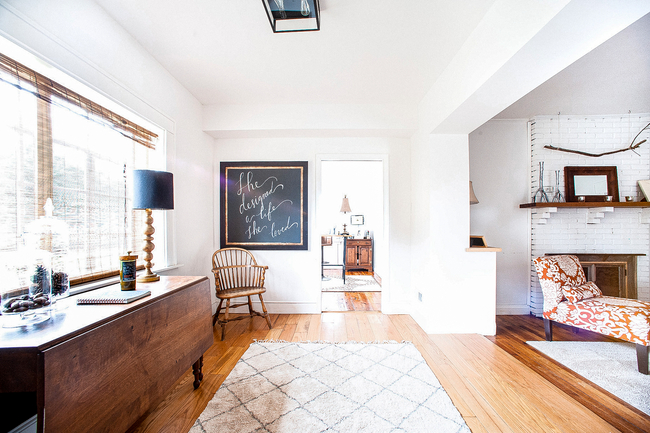
Entry | After

Entry | Before
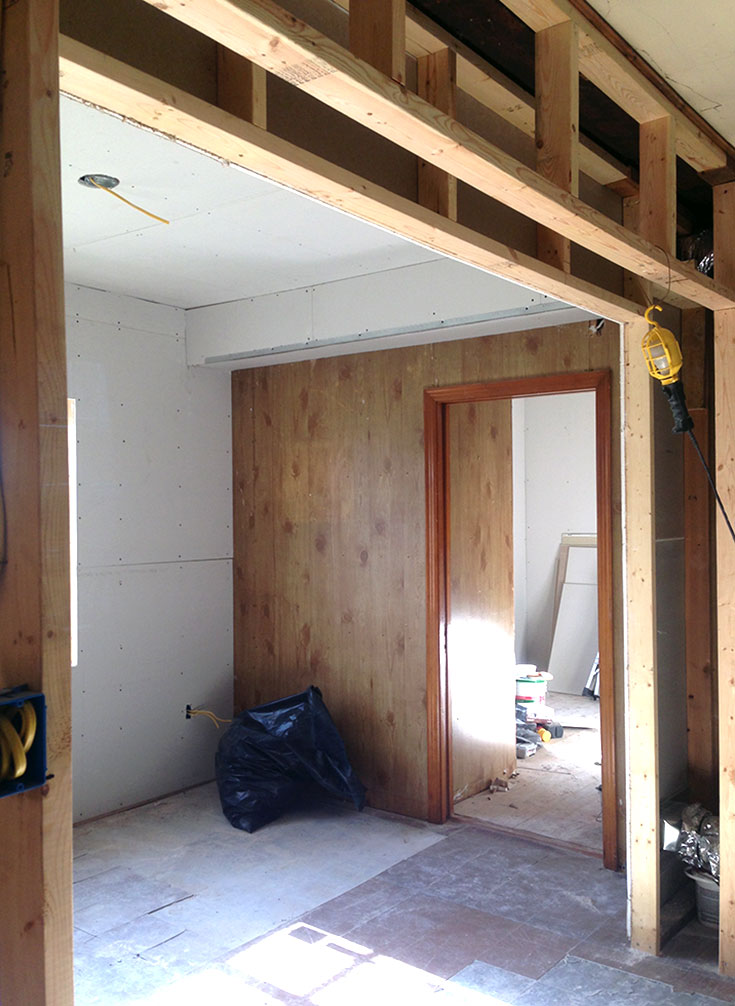
Entry | Progress
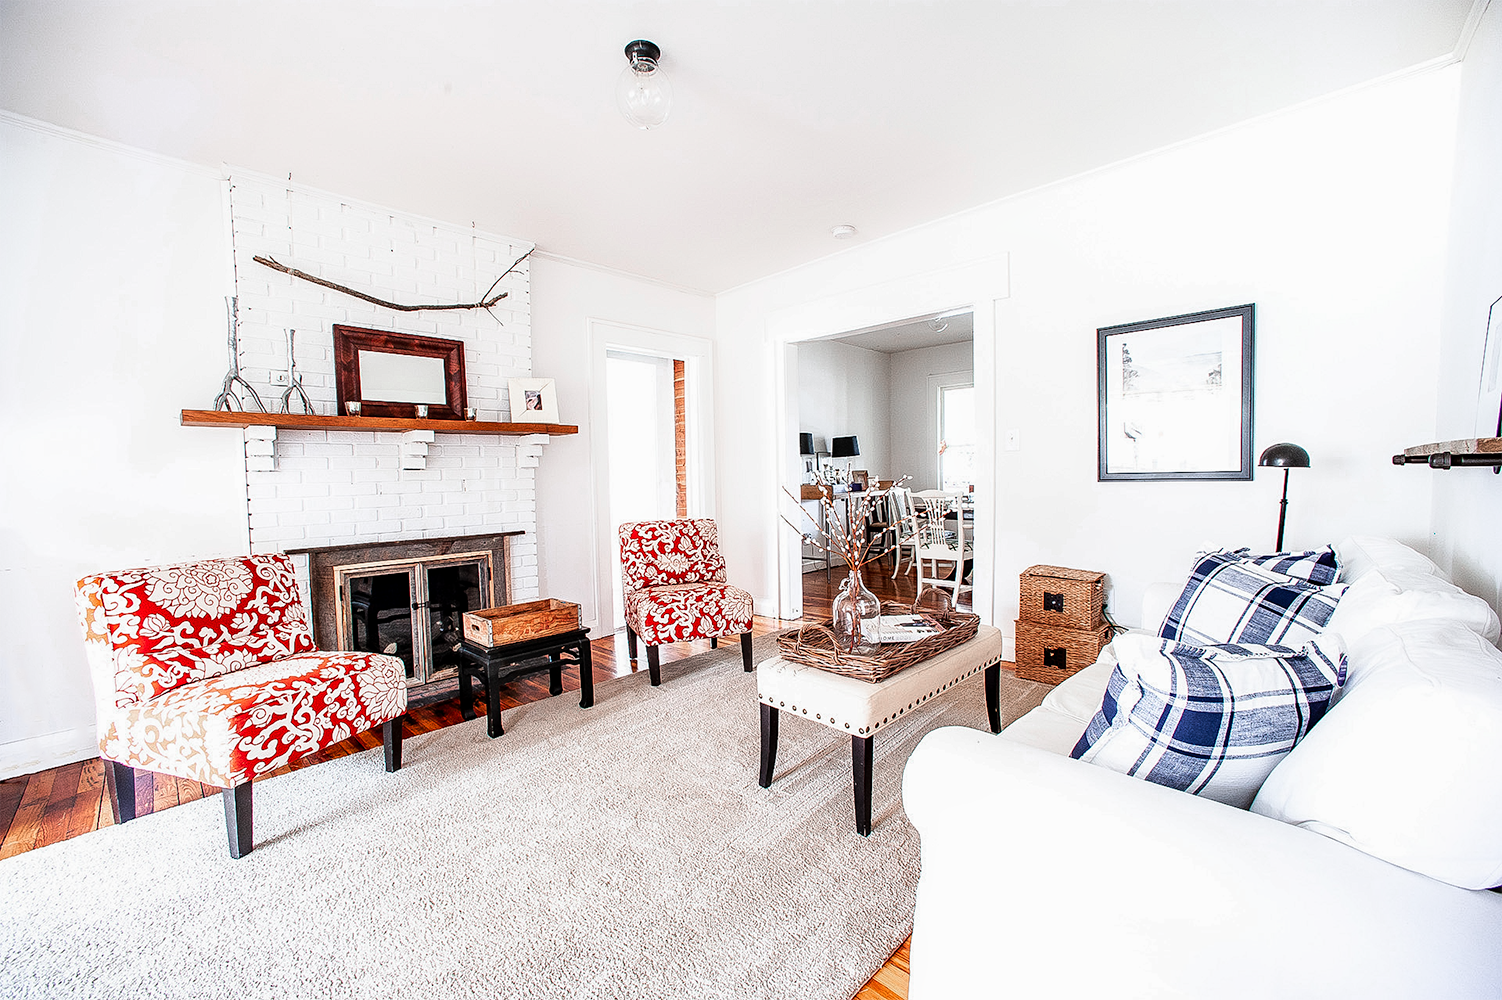
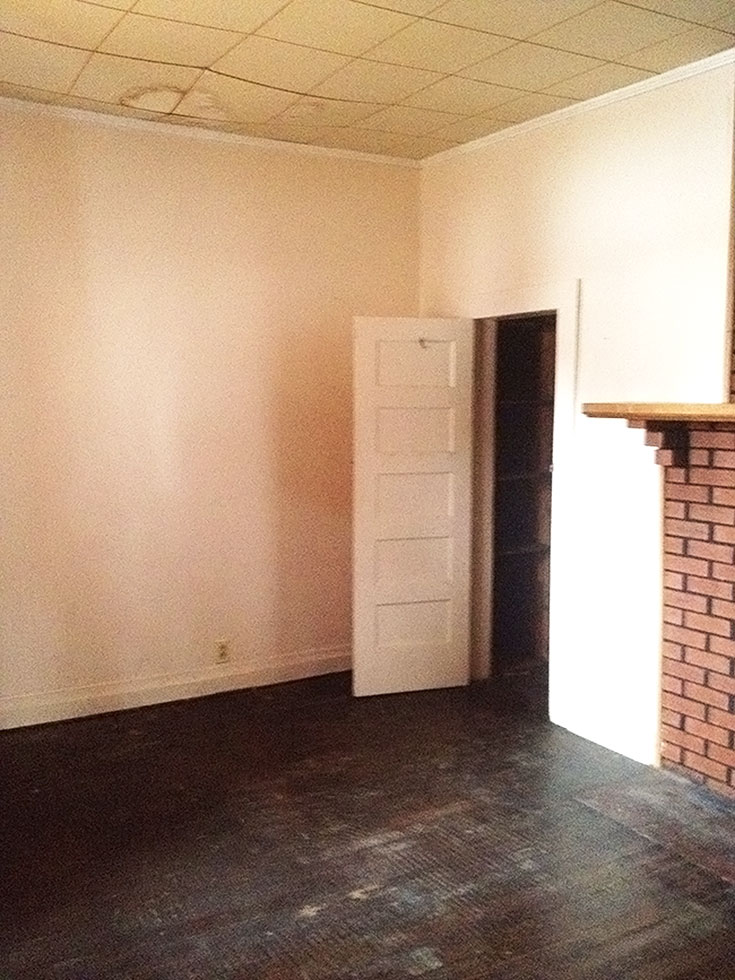
Living Room
The living room was dark and dingy when I purchased the house. It was in need of a major makeover. As mentioned above, we enclosed the entry space a bit to make it more intimate as you enter the house. We also enlarged the walkway into the dining room and moved the door going into the master bedroom. During the renovation, all of the linoleum was peeled up from the entry through to the dining room. I spent hours upon hours removing layers of mastic with an oscillating tool. Finally, I was able to refinish the original pine wood floors. Every wall got a bright white paint job. I even painted the fireplace brick, blending it into the walls. I would say, it is a big improvement over the original.
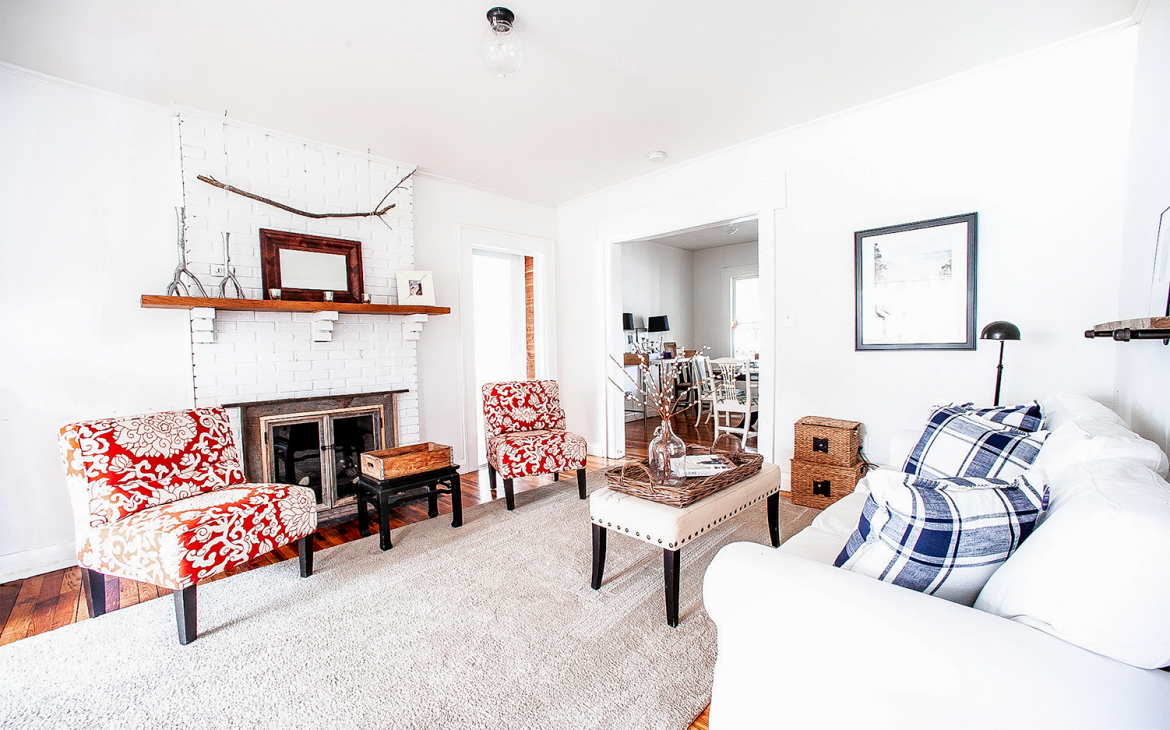
Living Room | After
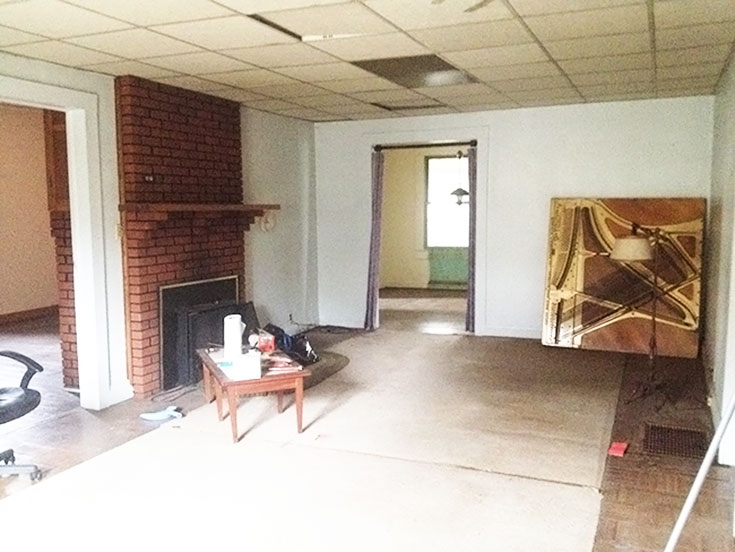
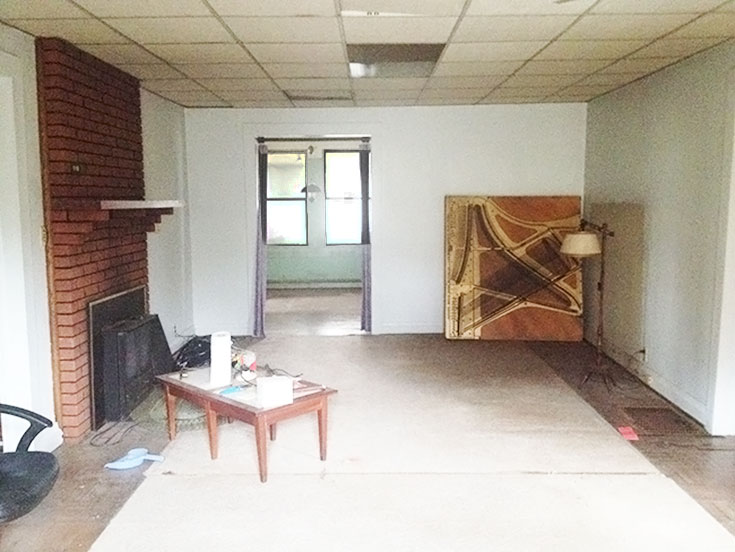
Living Room | Before
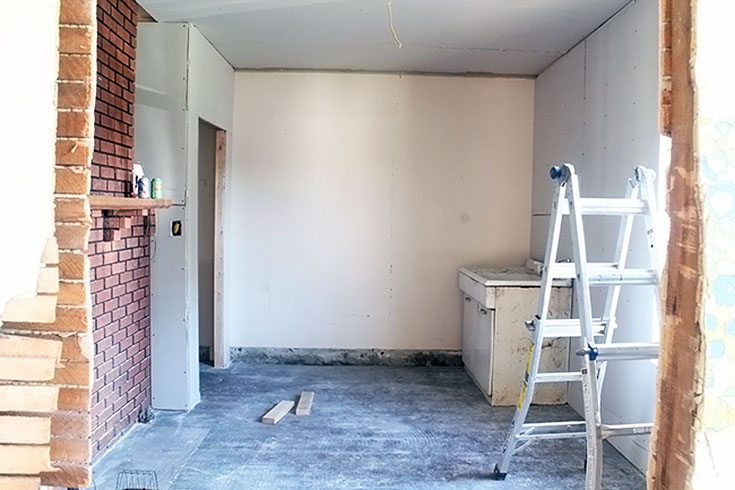
Kitchen
In the original floorplan, the kitchen was located off of the dining room. The kitchen became my master bathroom and the new kitchen was moved onto the long enclosed back porch (you can find the floor plan changes here). One of the things I first noticed about the house was how big and beautiful the windows were on the back porch. This got me thinking about how cool it would be move the kitchen out there. Doing that would create a massive farmhouse style kitchen. It worked and to this day, it one of my favorite rooms in the house. Not to mention, friends and my AirBnB guests often comment on how awesome the kitchen is for cooking and gathering. We started from scratch with the kitchen design. You can find a the original layout designs in this post.
A laundry room and pantry were framed in on one side of the kitchen, the stairs to the basement were removed and a door to the old kitchen was removed. The exterior door to the patio was moved and we added a second window to the work area of the kitchen. The style of the kitchen is simple and rustic. To keep this theme, we even DIYed the open shelving (tutorial coming next week).
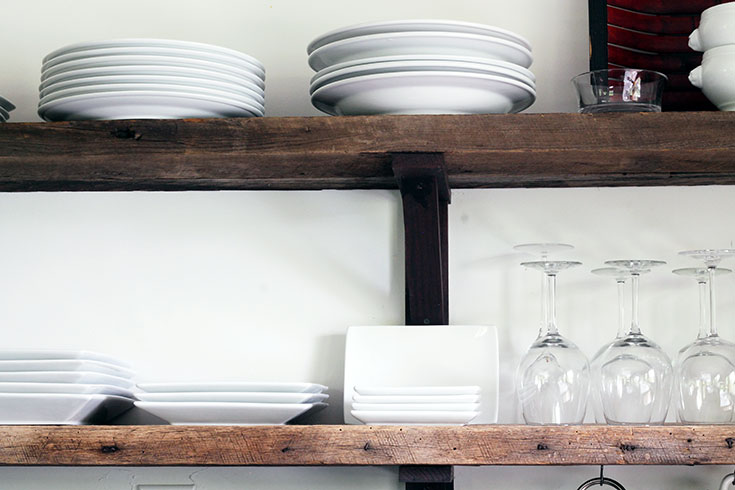
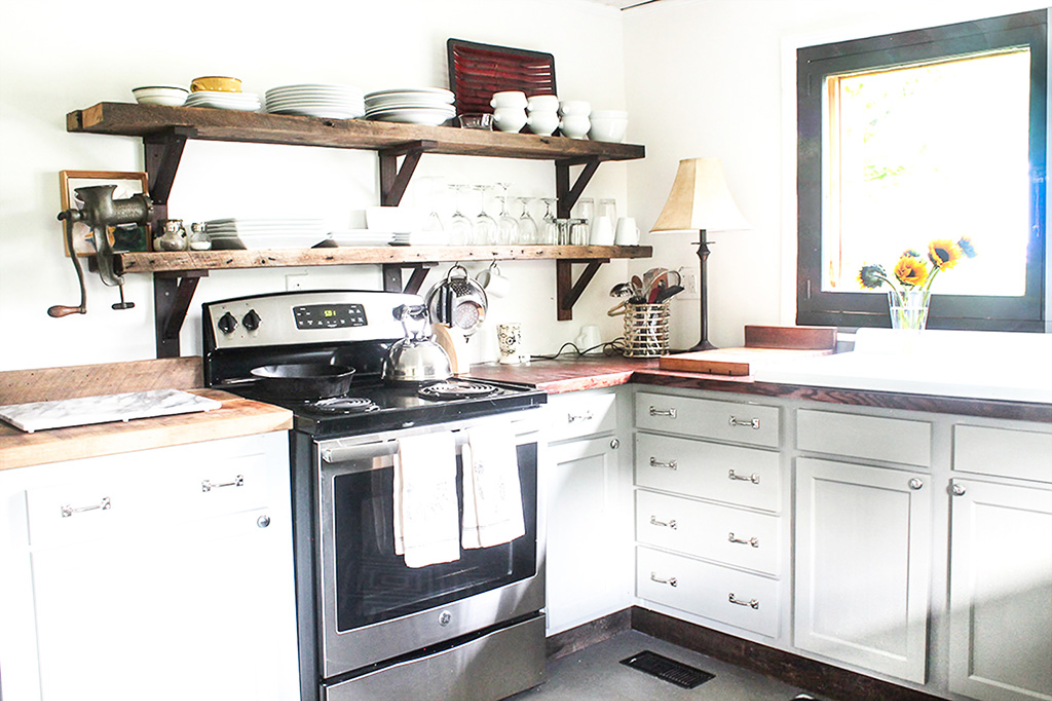
Kitchen | After
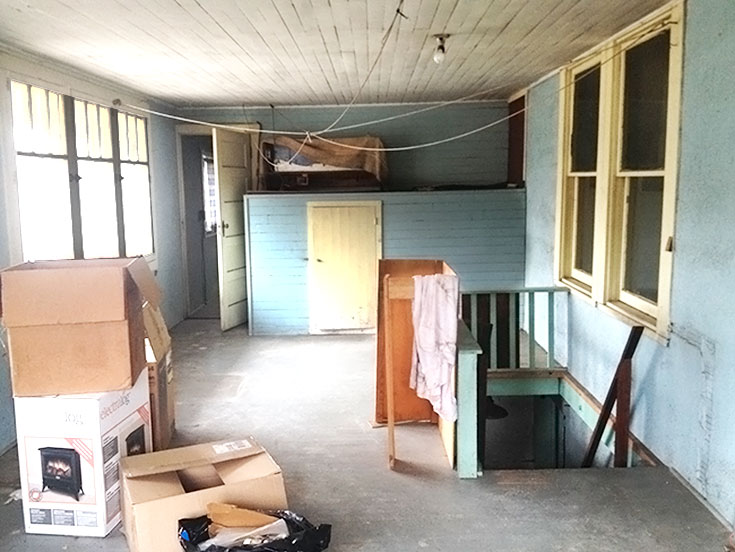
Kitchen | Before
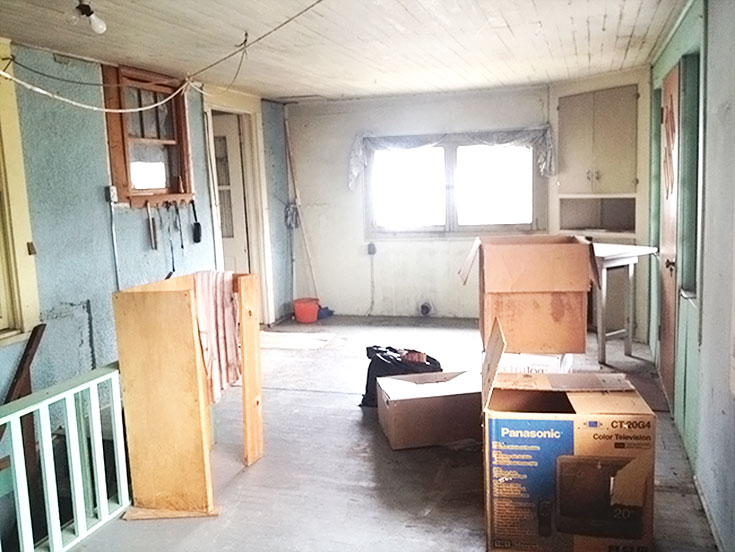
Dining Room
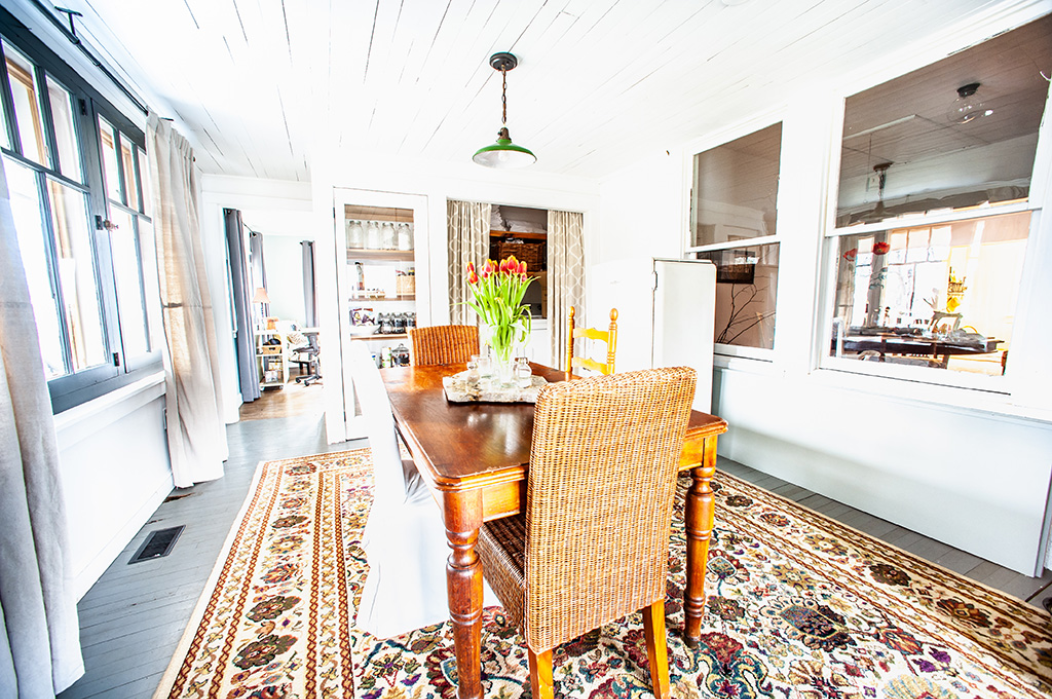
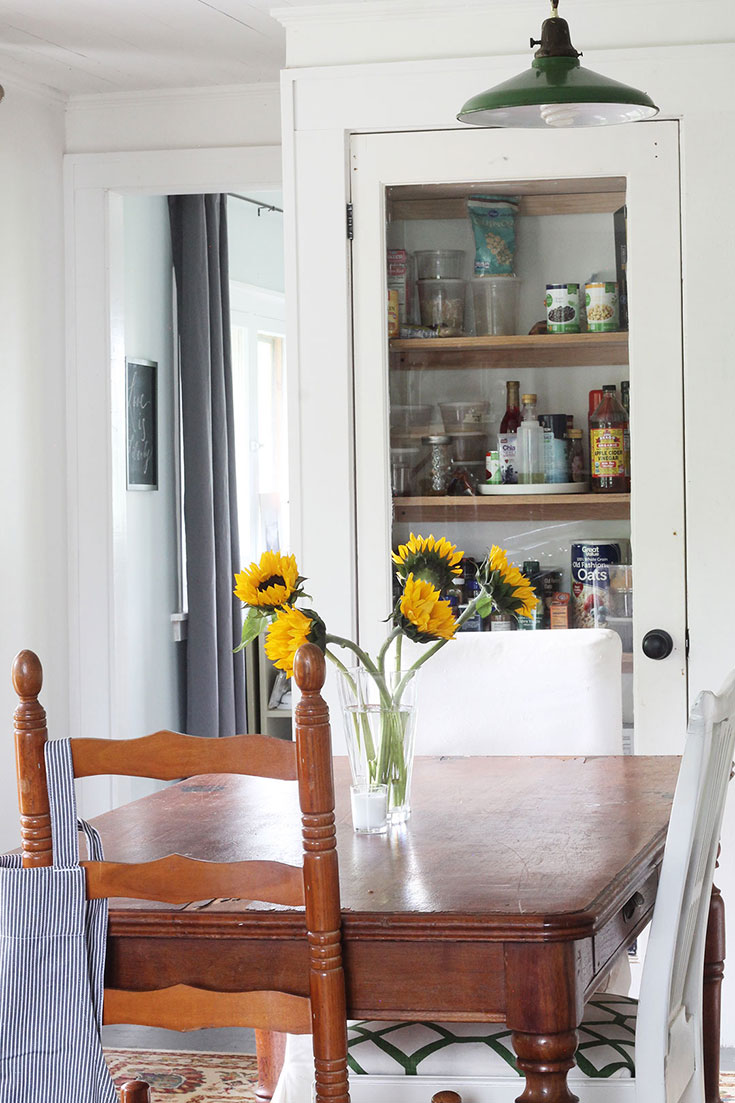
The dining room was one of the last rooms we started. Fortunately, we didn’t have to do a lot to it. We simply closed up the door to the old kitchen, now my bathroom removed the old linoleum, and refinished the hardwood floors. Of course, we also gave it a fresh coat of bright white paint. As you will see in the third photo below, there are two windows in the dining room that look into the kitchen. Eventually, those will be opened into a doorway that will leads you into the kitchen. For now, I like the large panes of wavy old glass and the bright light that streams in through them from the kitchen.
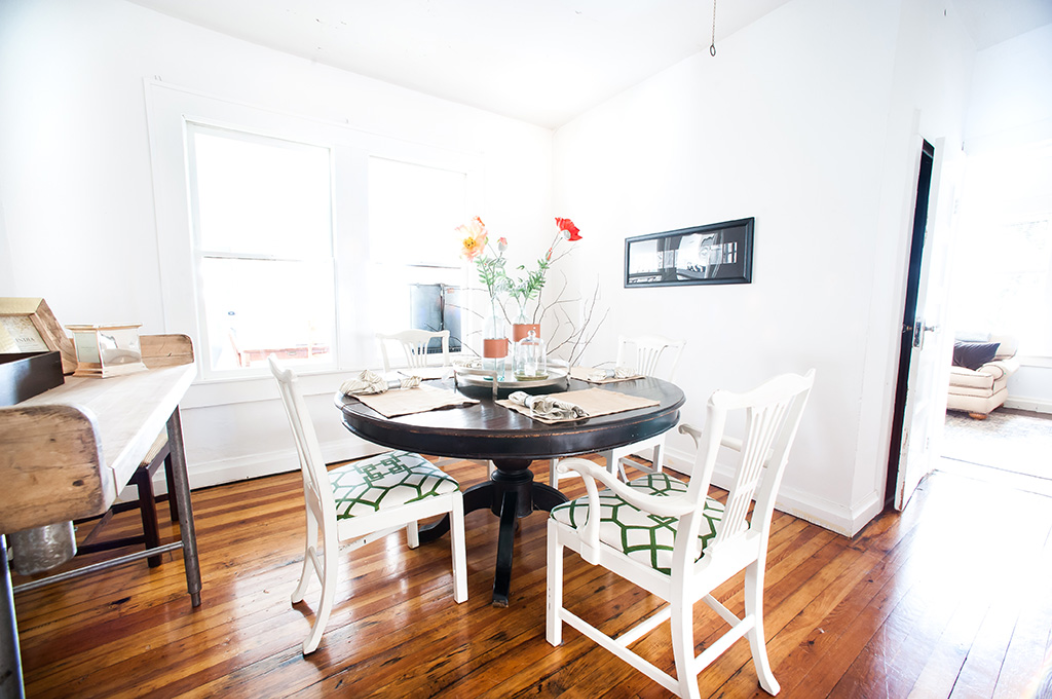
Dining Room | After
Dining Room | Before
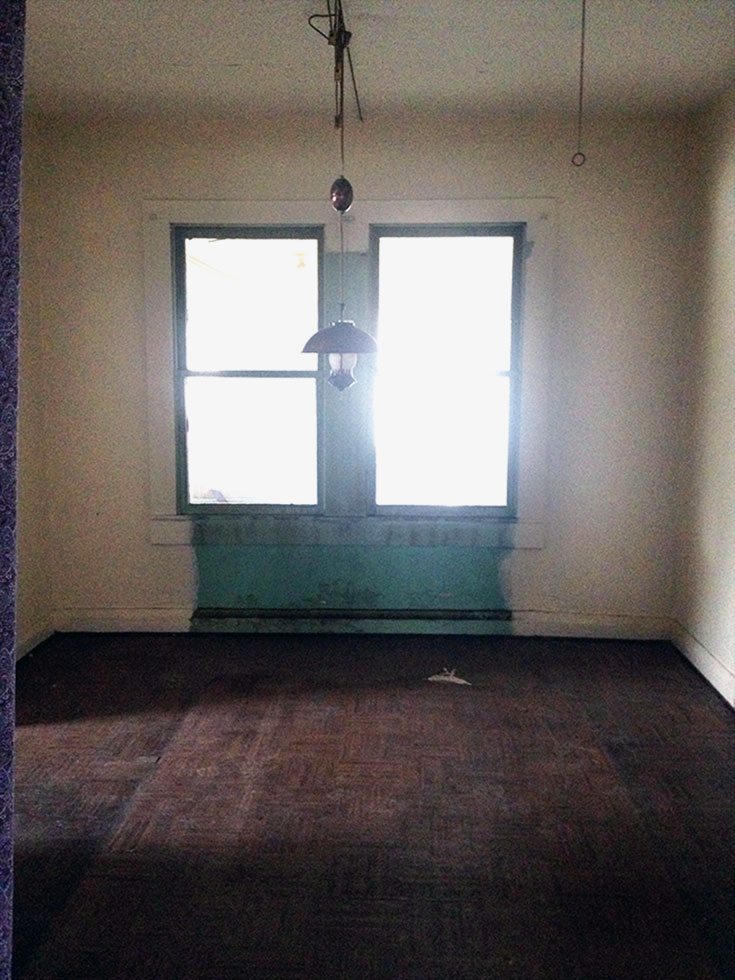
Master Bedroom
The master bedroom changes were fairly simple compared to renovations throughout the rest of the house. We moved the entrance to the room and a closet. Finally, a new doorway was added from the master bedroom to the bathroom by opening the wall in-between. This room was in pretty good shape when we found it. I have plans to add a sliding barn door between the bedroom and bathroom. It will become a DIY tutorial this winter.
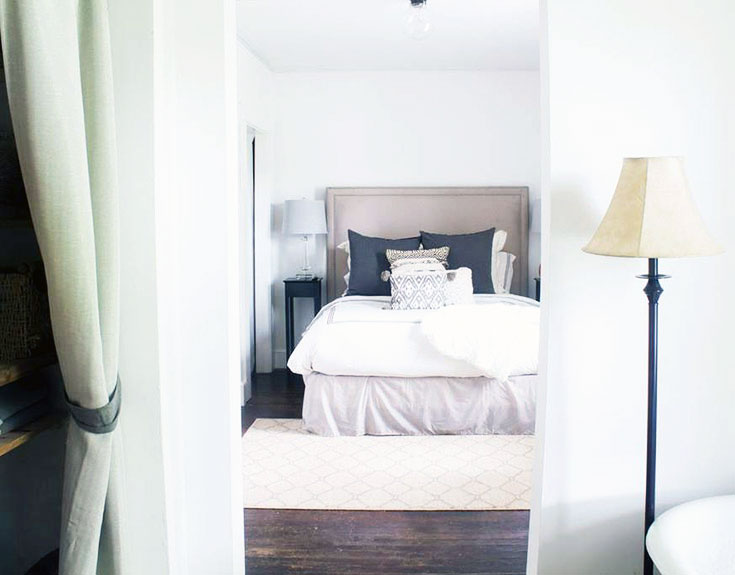
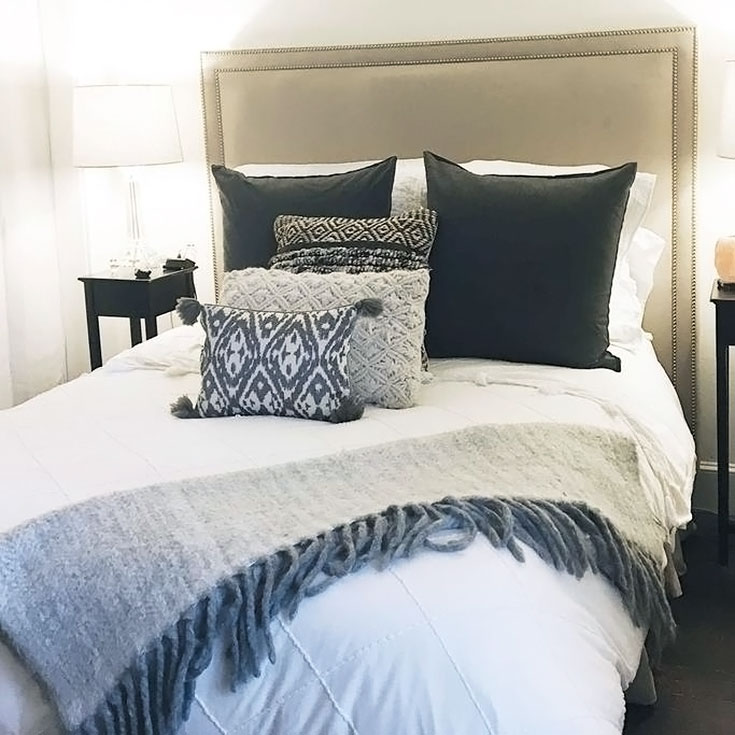
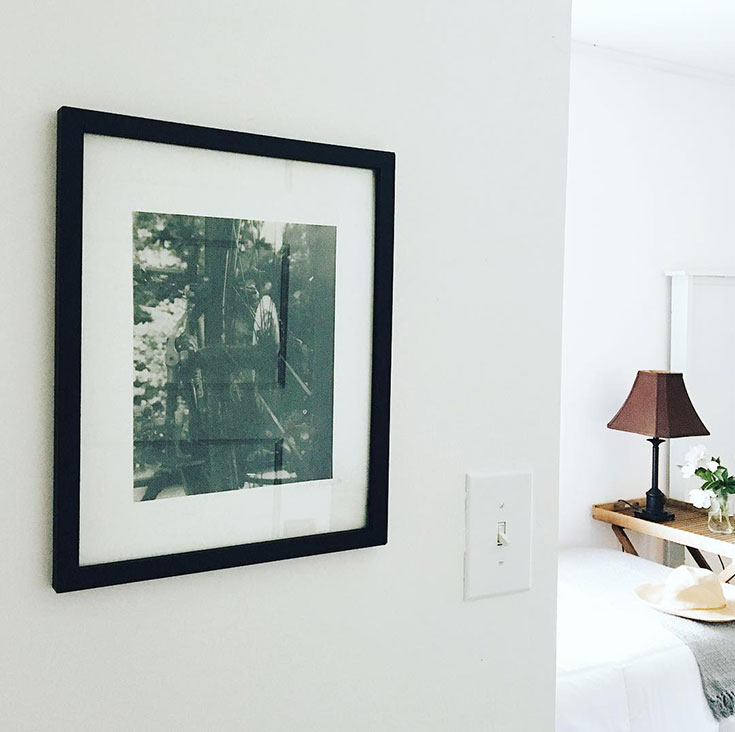
Master Bedroom | After
Master Bedroom | Before

Master Bedroom | Progress | Dad Sheetrocking
Master Bathroom
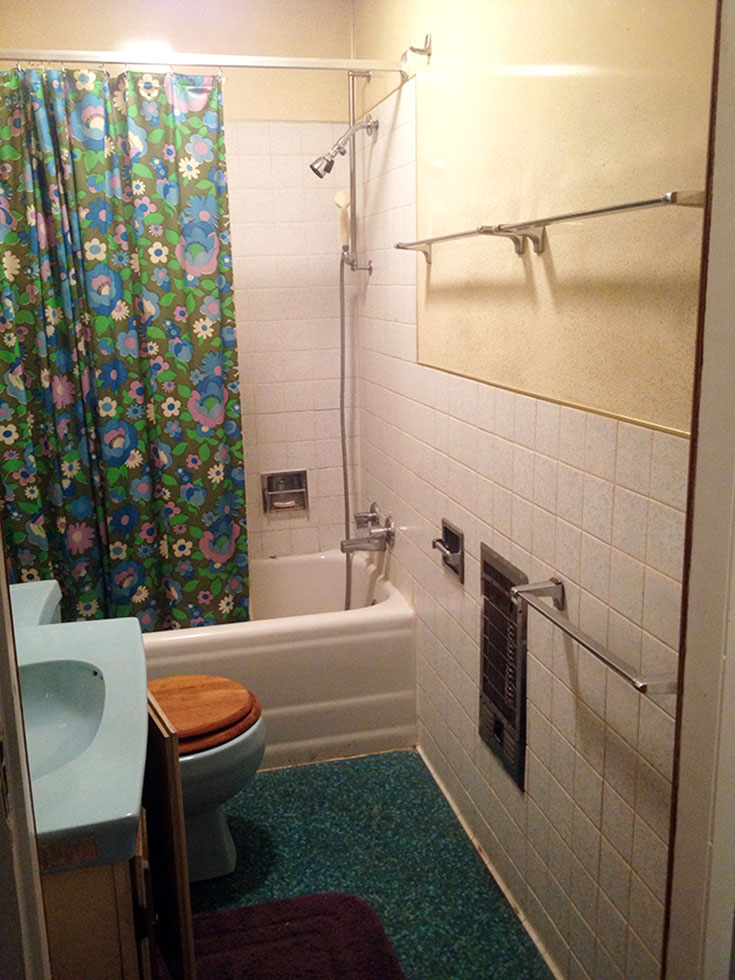
The master bathroom was a huge overhaul compared to the bedroom. This room was originally the kitchen. We opened up the wall between the master bedroom and bathroom. Framed out space for the toilet, vanity, and shower stall. Sheet rocked, mudded, painted, removed linoleum and mastic from the floors, and added a clawfoot tub. The clawfoot tub still has not been refinished, I will plan the restoration as a DIY tutorial. I am looking for guidance on how to refinish a clawfoot tub, if you have done it, please let me know!
We built the vanity shelf out of an old storage door we found in the kitchen (you can see it in the first Before photo of the kitchen, the backside is yellow, it appears yellow in the photo). I saw the green and immediately fell in love with it! I knew I wanted to repurpose it somewhere in the house and the bathroom was the perfect spot. The vanity sink I found at the Habitat for Humanity Restore in Charleston, WV. I thought it was charming and bought it for $10. I am pretty sure it came out of an old schoolhouse (or at least that is where I imagine it originated.) This room, I wanted to keep classic. We used white subway tile with light gray grout for the shower stall.
This room has a really neat, large light green painted border around the room. I found it when I started taking up the linoleum. Under the linoleum were rustic hardwoods with the wide painted green border. Obviously the previous owners had painted around an area rug at one time in the kitchen. For me, it is just a part of the house’s story and I love it!
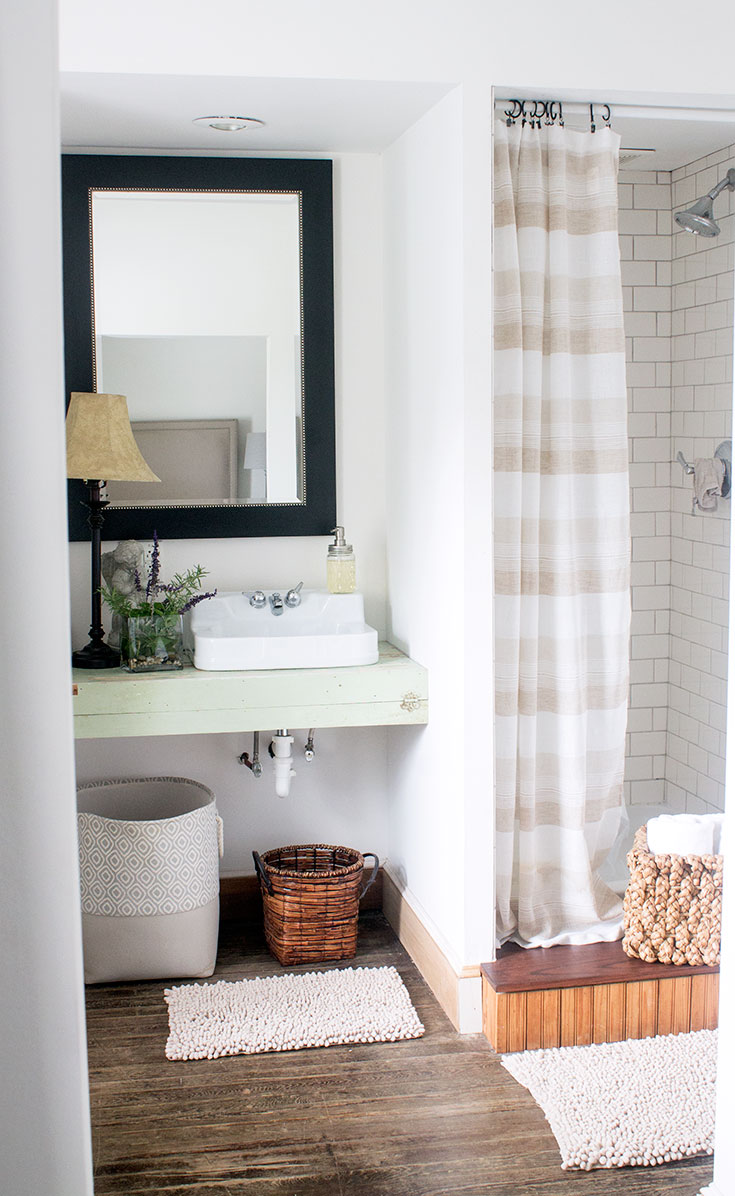
Master Bathroom | After
Master Bathroom | Before
Guest Bedroom
The guest bedroom and tv room were pretty simple renovations. Nothing major, we kept the original hardwoods, moved a couple of closets, reframed the exterior walls, added new insulation and sheetrock. After those projects were complete, we gave each room a fresh coat of bright white paint.

Guest Bedroom | After

Guest Bedroom | Before
Guest Bathroom
Guest Bathroom | After
Guest Bathroom | Before
TV Room

TV Room | After
TV Room | Before
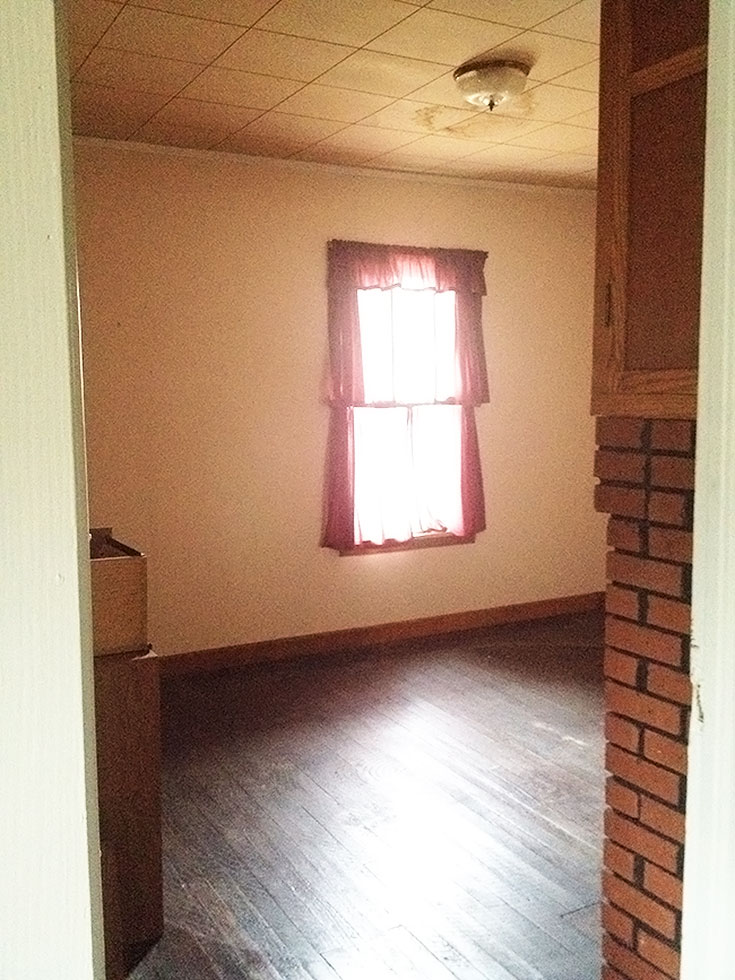
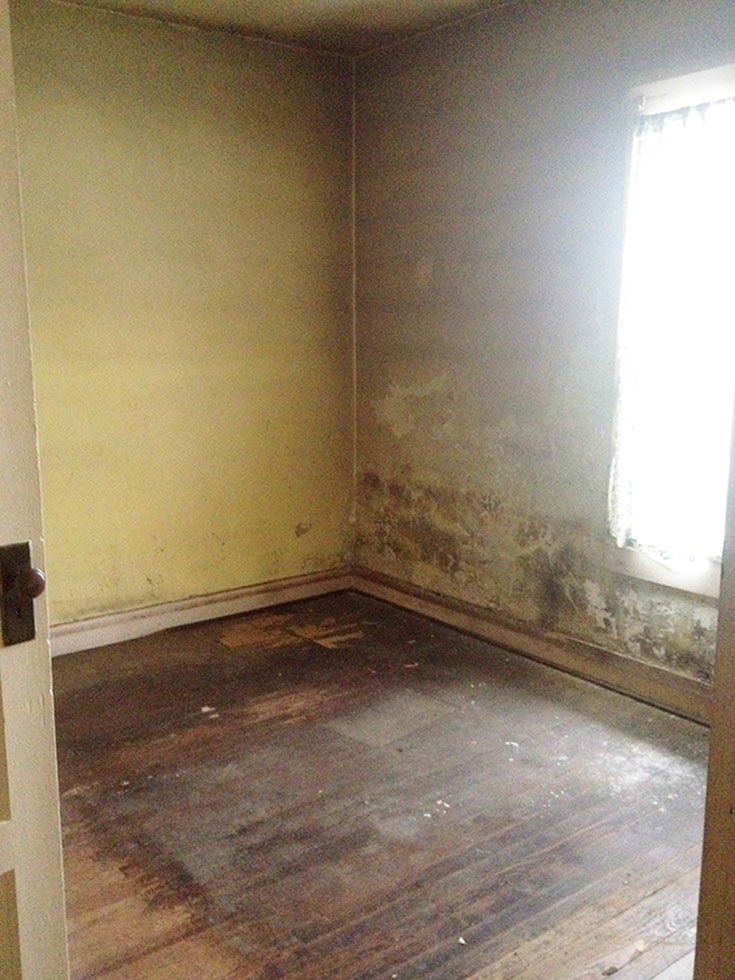
Office
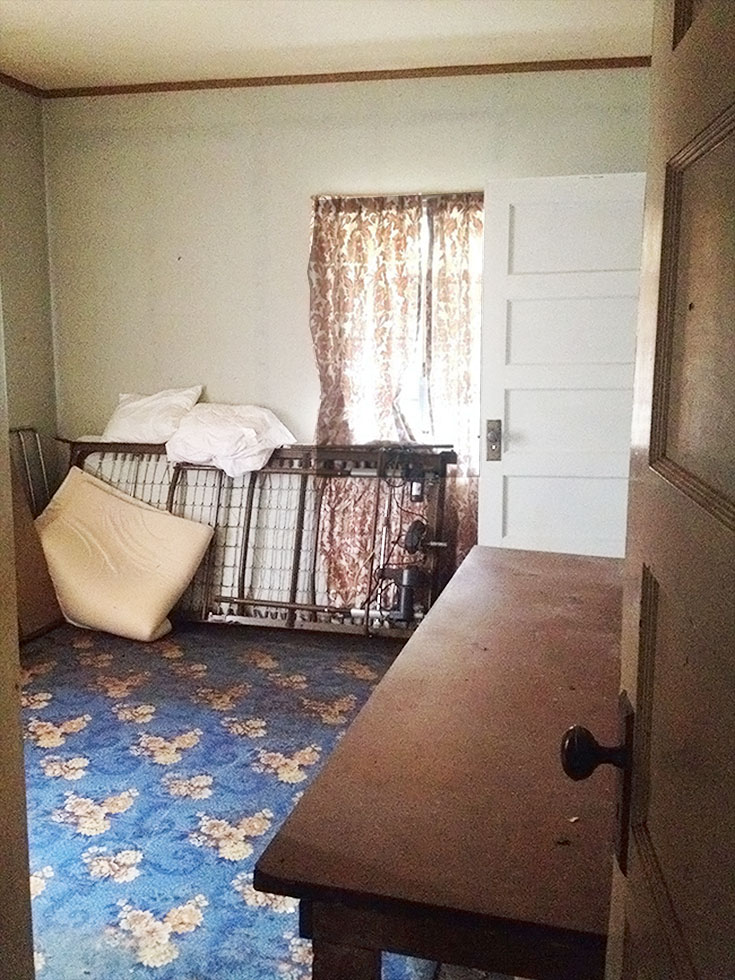
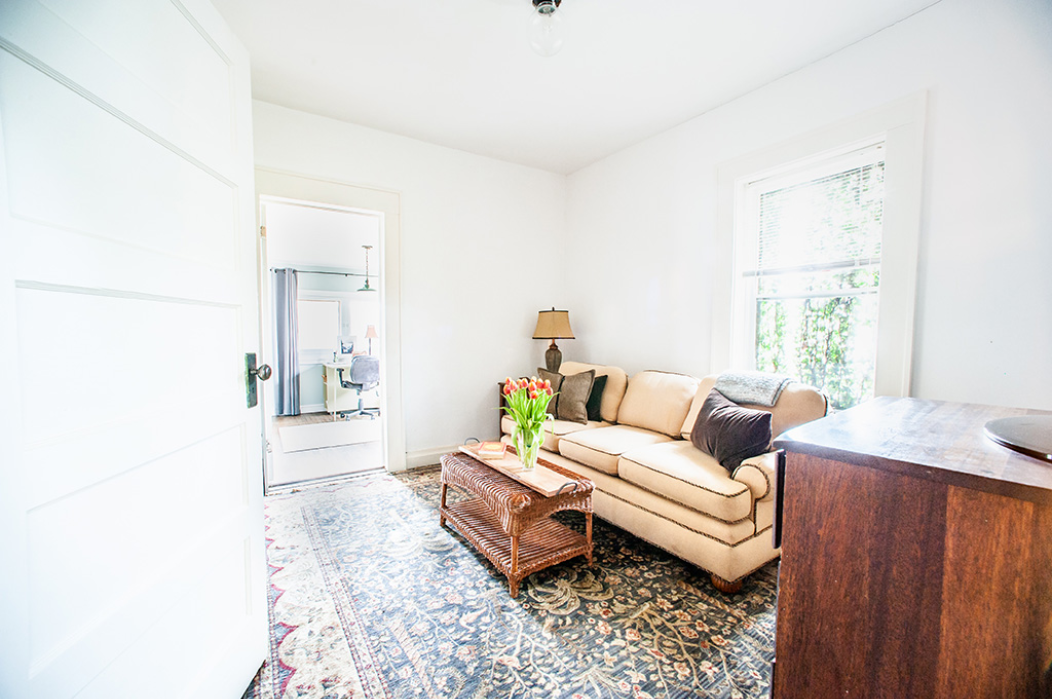
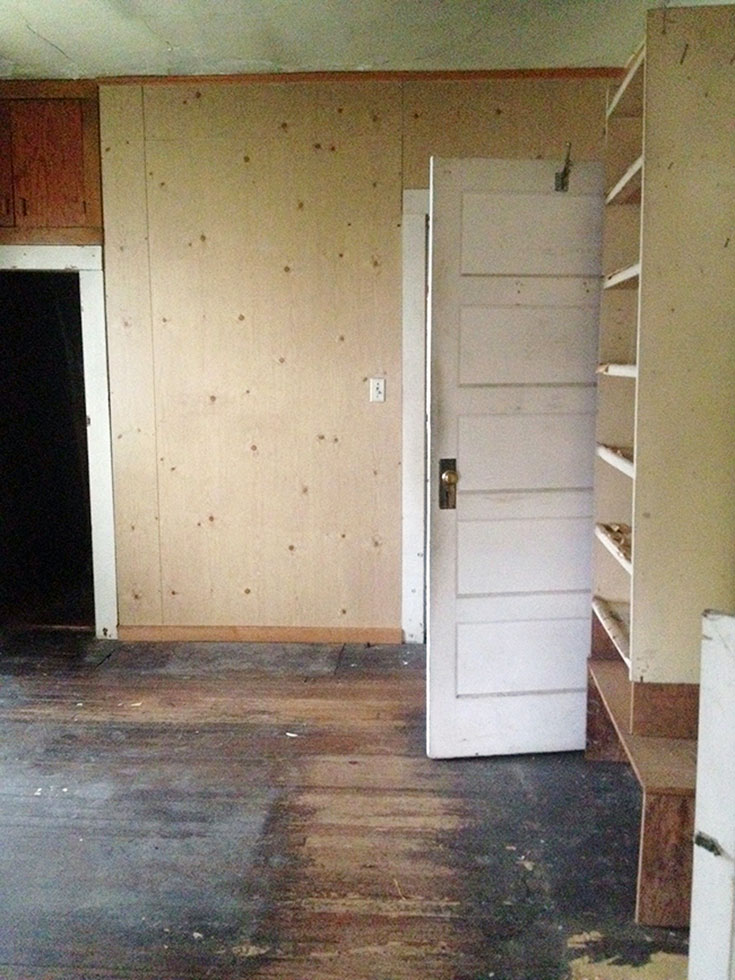
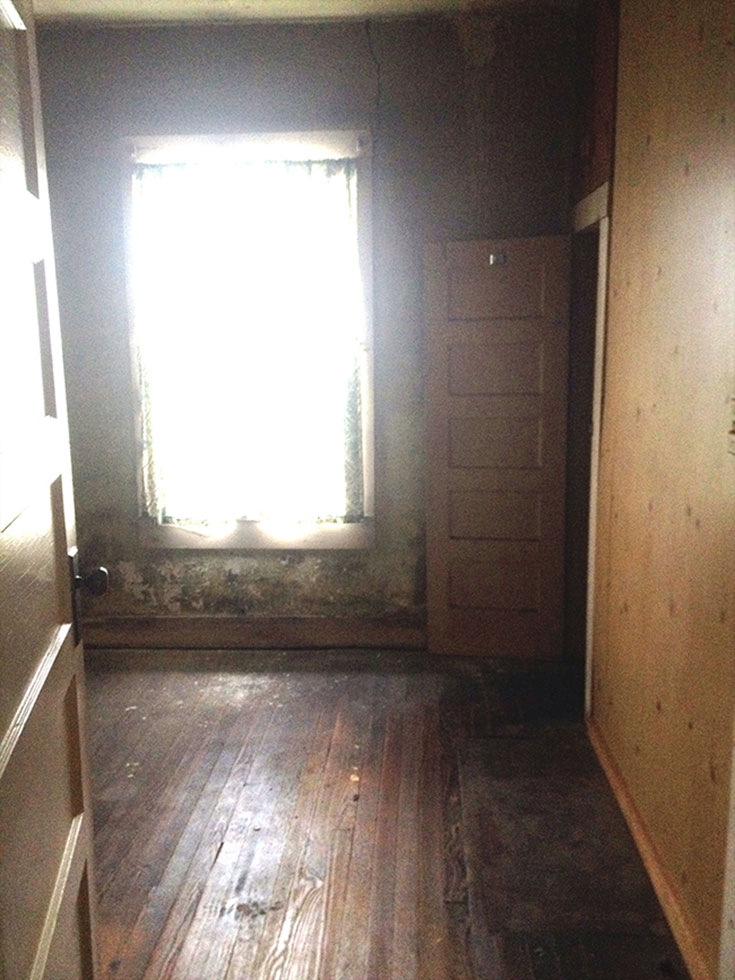
Last but not least on this tour, the office. This is where I spend most of my time when I’m home. It is the perfect office. The light streams through it really beautifully and I always feel creative when I am working in here. Unfortunately, as you will be in the Before photos. It was not always an inspiring place. When I found this room, it was dark and dingy like everything else. The walls were sheetrock with a layer of faux wood papered on to them. It had old green linoleum that was peeling up and a drop ceiling.
We started by removing the drop ceiling. This revealed another foot in height to the room. The sheetrock was still in good condition, but because it was “faux wood” it had not been mudded and finished. You could still see the seams. To fix that, we added wooden battens to cover the seams. This is one reason I love the room so much, the battens add a lot more character than just finishing the sheetrock. During the renovation process, we found beautiful tongue and groove pine floors in the attic. They weren’t attached to the ceiling joists, just haphazardly laid across the beams so that you could walk in the attic. We decided to take them out of the attic and we used them as flooring in the office. We barely had enough, but it turned out beautiful. I wrote a post about repurposing the old floors here.

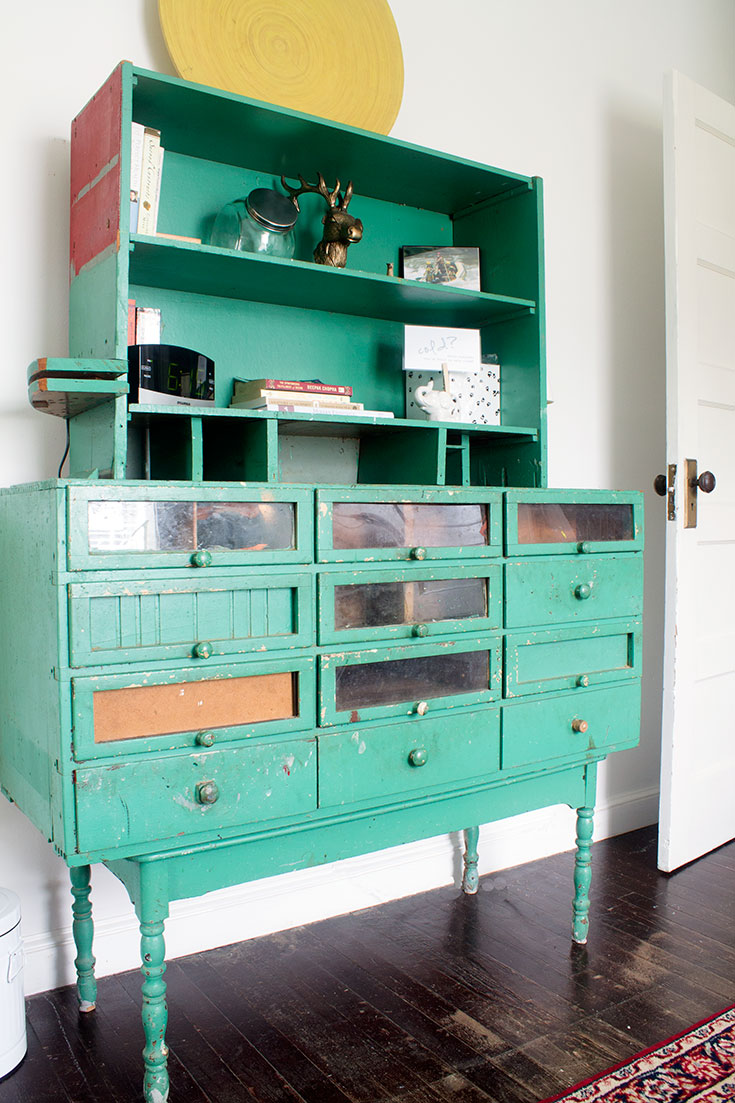
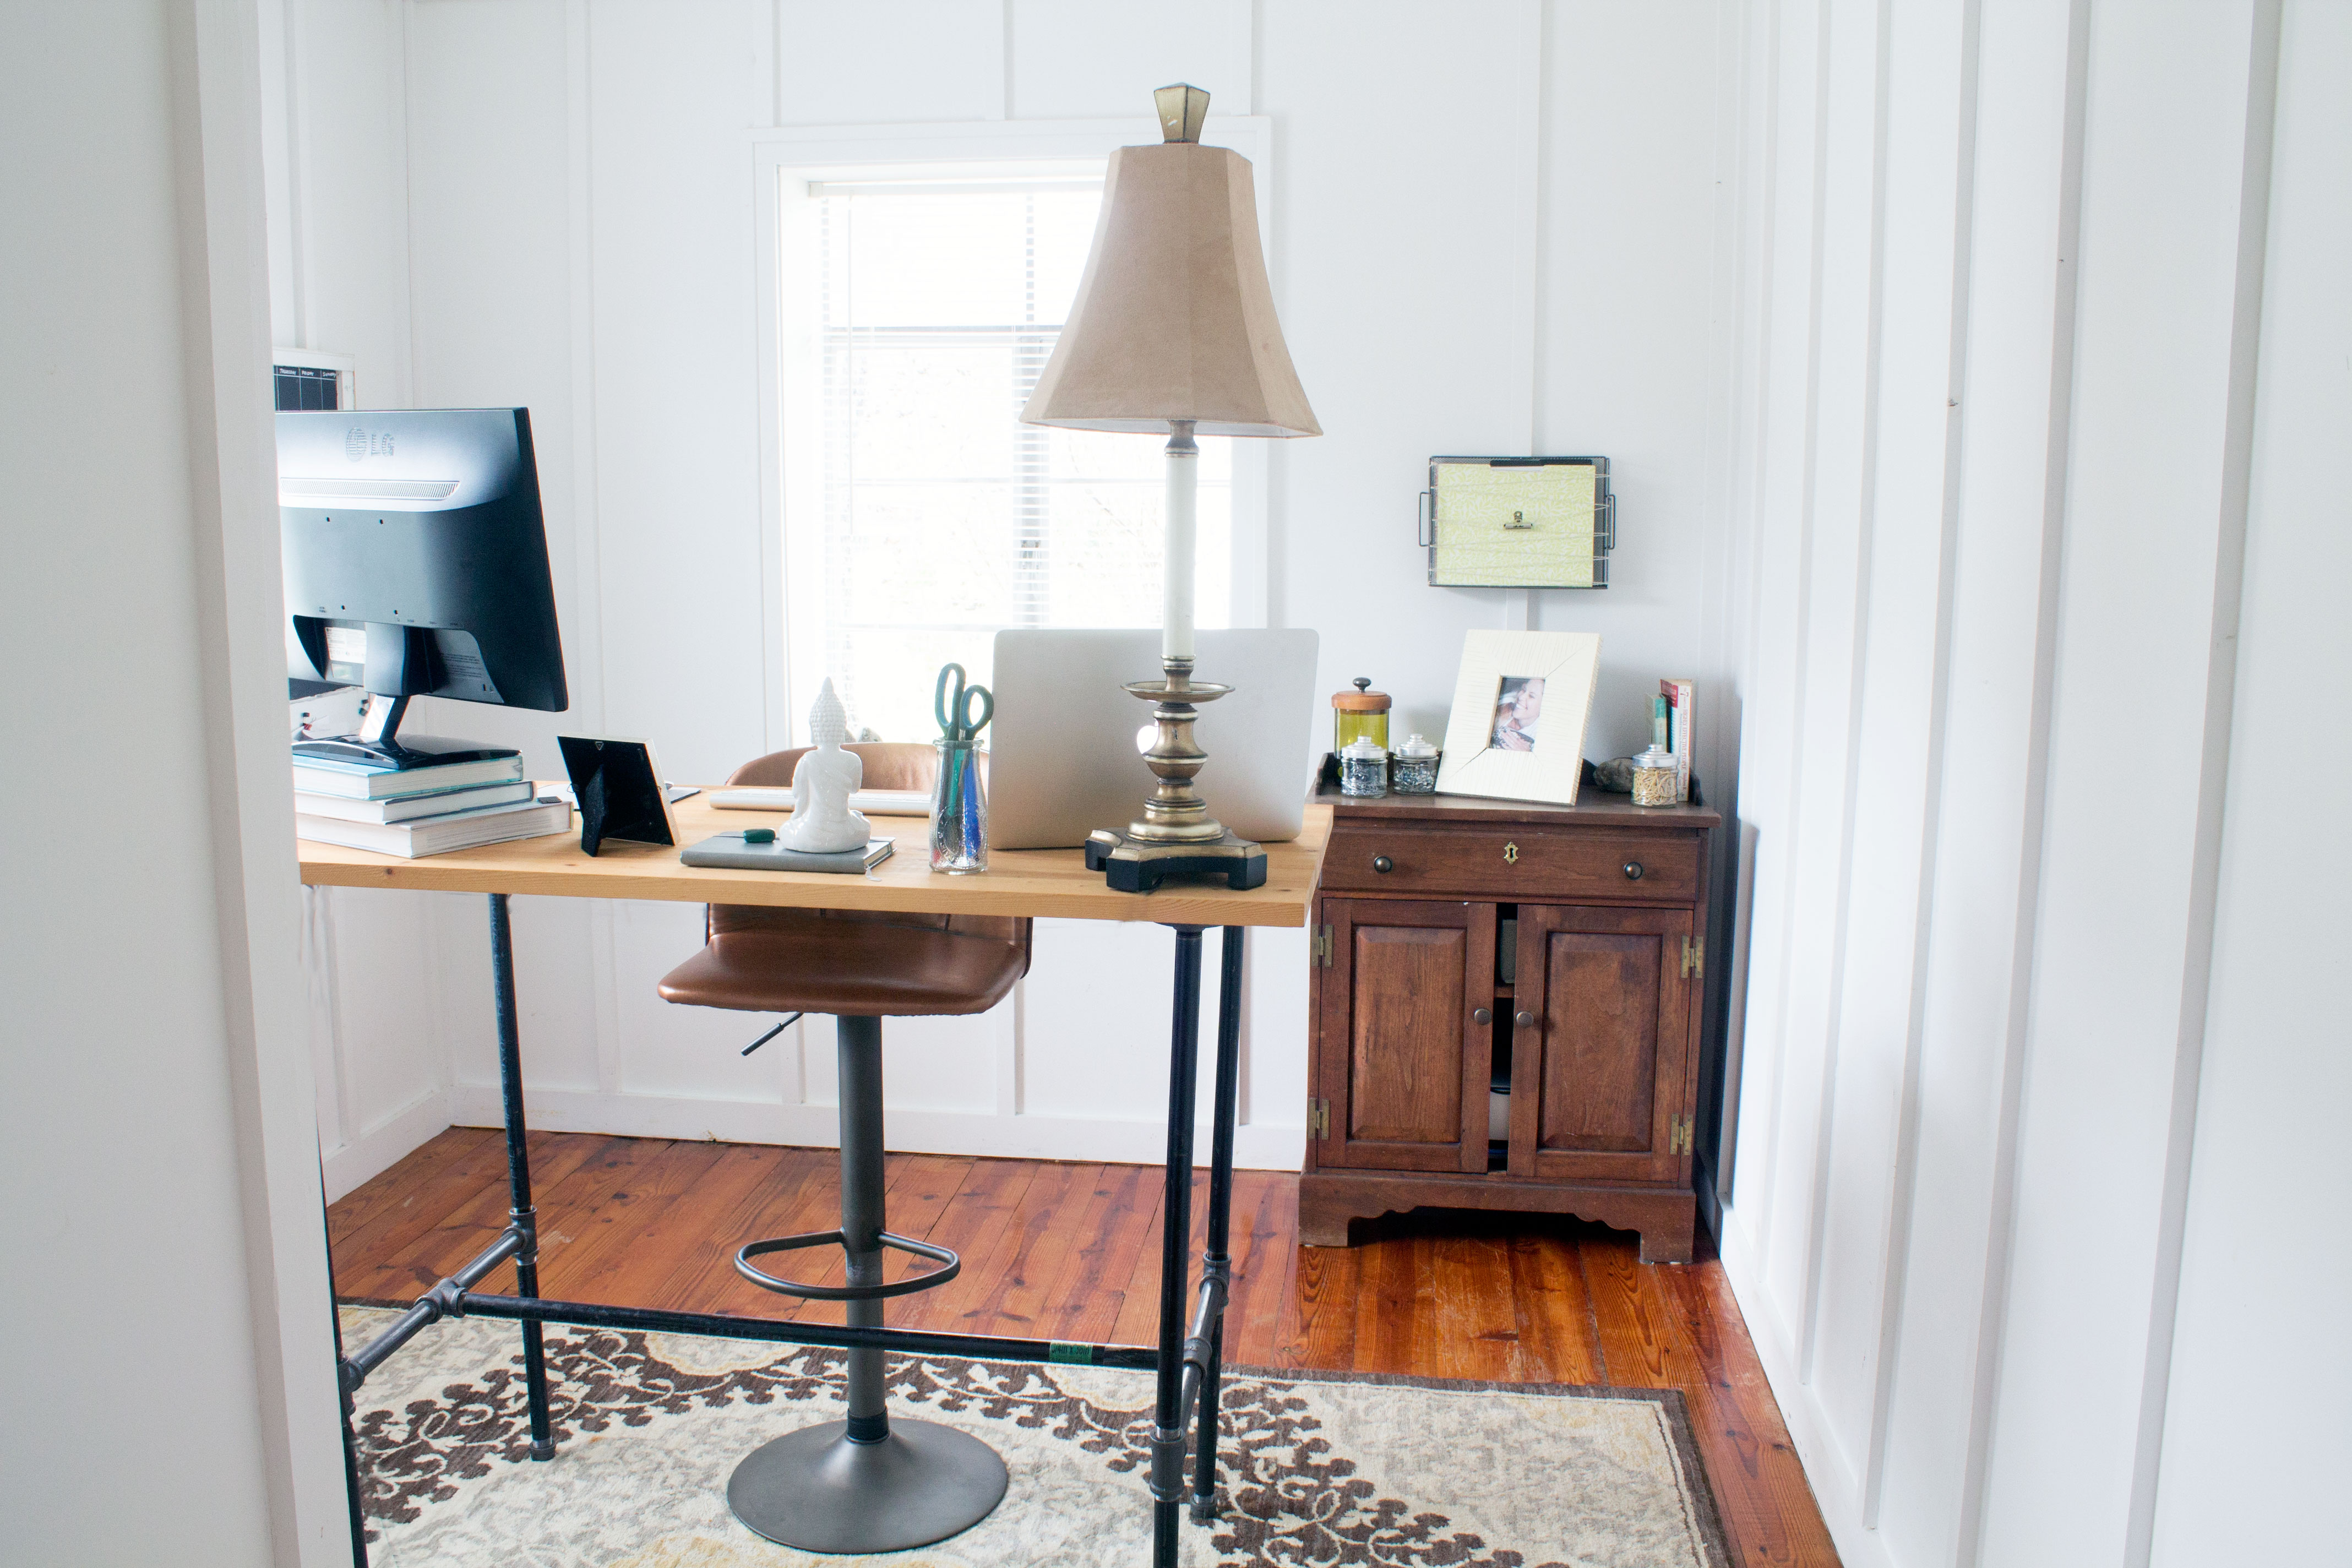 Office | After
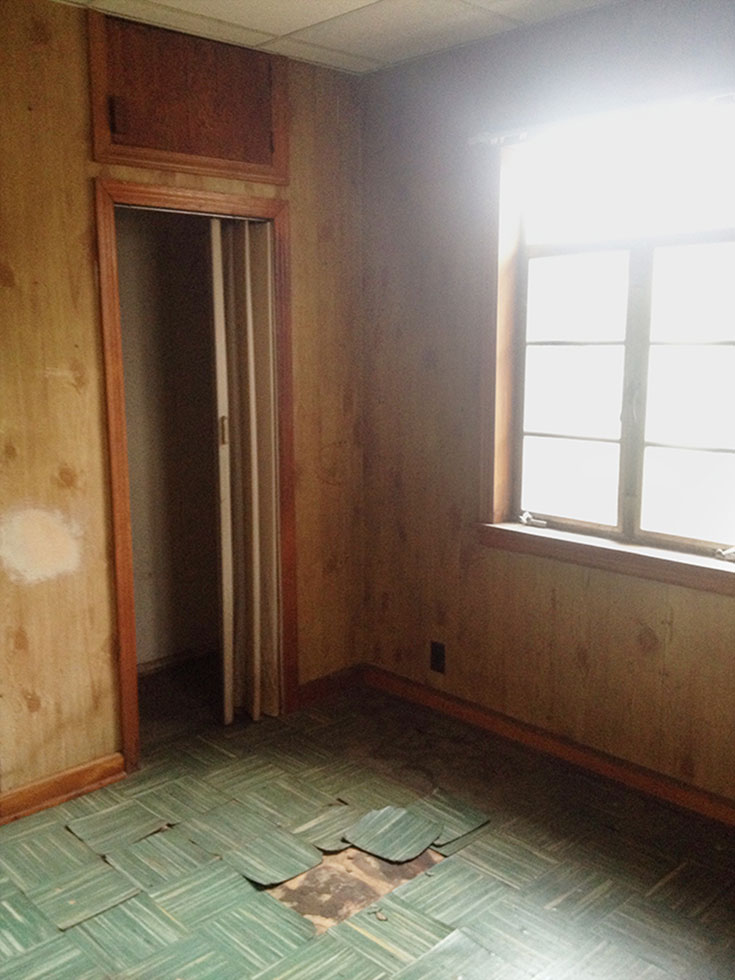
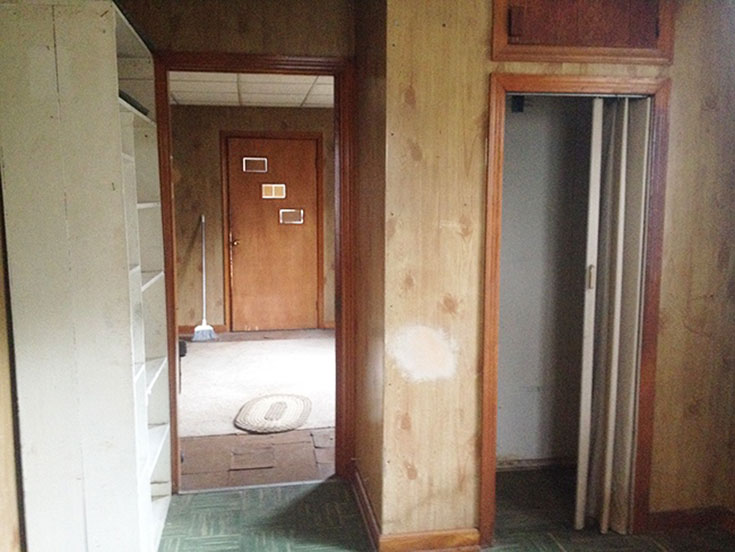
Office | Before
Wow, this was a long post and it only skims the surface of this TOTAL house makeover. Can you believe the transformation? I still can’t believe it as I look back through the Before and After photos. I will be sharing more details and projects as I continue to make this house into a home. Thank you for following along! As I mentioned at the start of this post, I started blogging about this project long before I started this little home on the web. I have transferred many of the posts from my old blog into the archives here.
Start here to get caught up on the beginning of my renovation journey.
Home Sweet Home: Visionboard. How do you think the After’s compare to my original design vision for the house?
I posted our first progress report here. I bought the house in early June, 2014 and this update was from the end of August, 2014.
Year-End Progress from 2014. Check out where we were 6 months into our renovation project. Can you believe how far we’ve come?
** I shared this post to Wall to Wall DIY Wednesday and Inspire me Monday!